
Looking for a fun summer project? Try making your own tie-dye shoes!
MATERIALS:
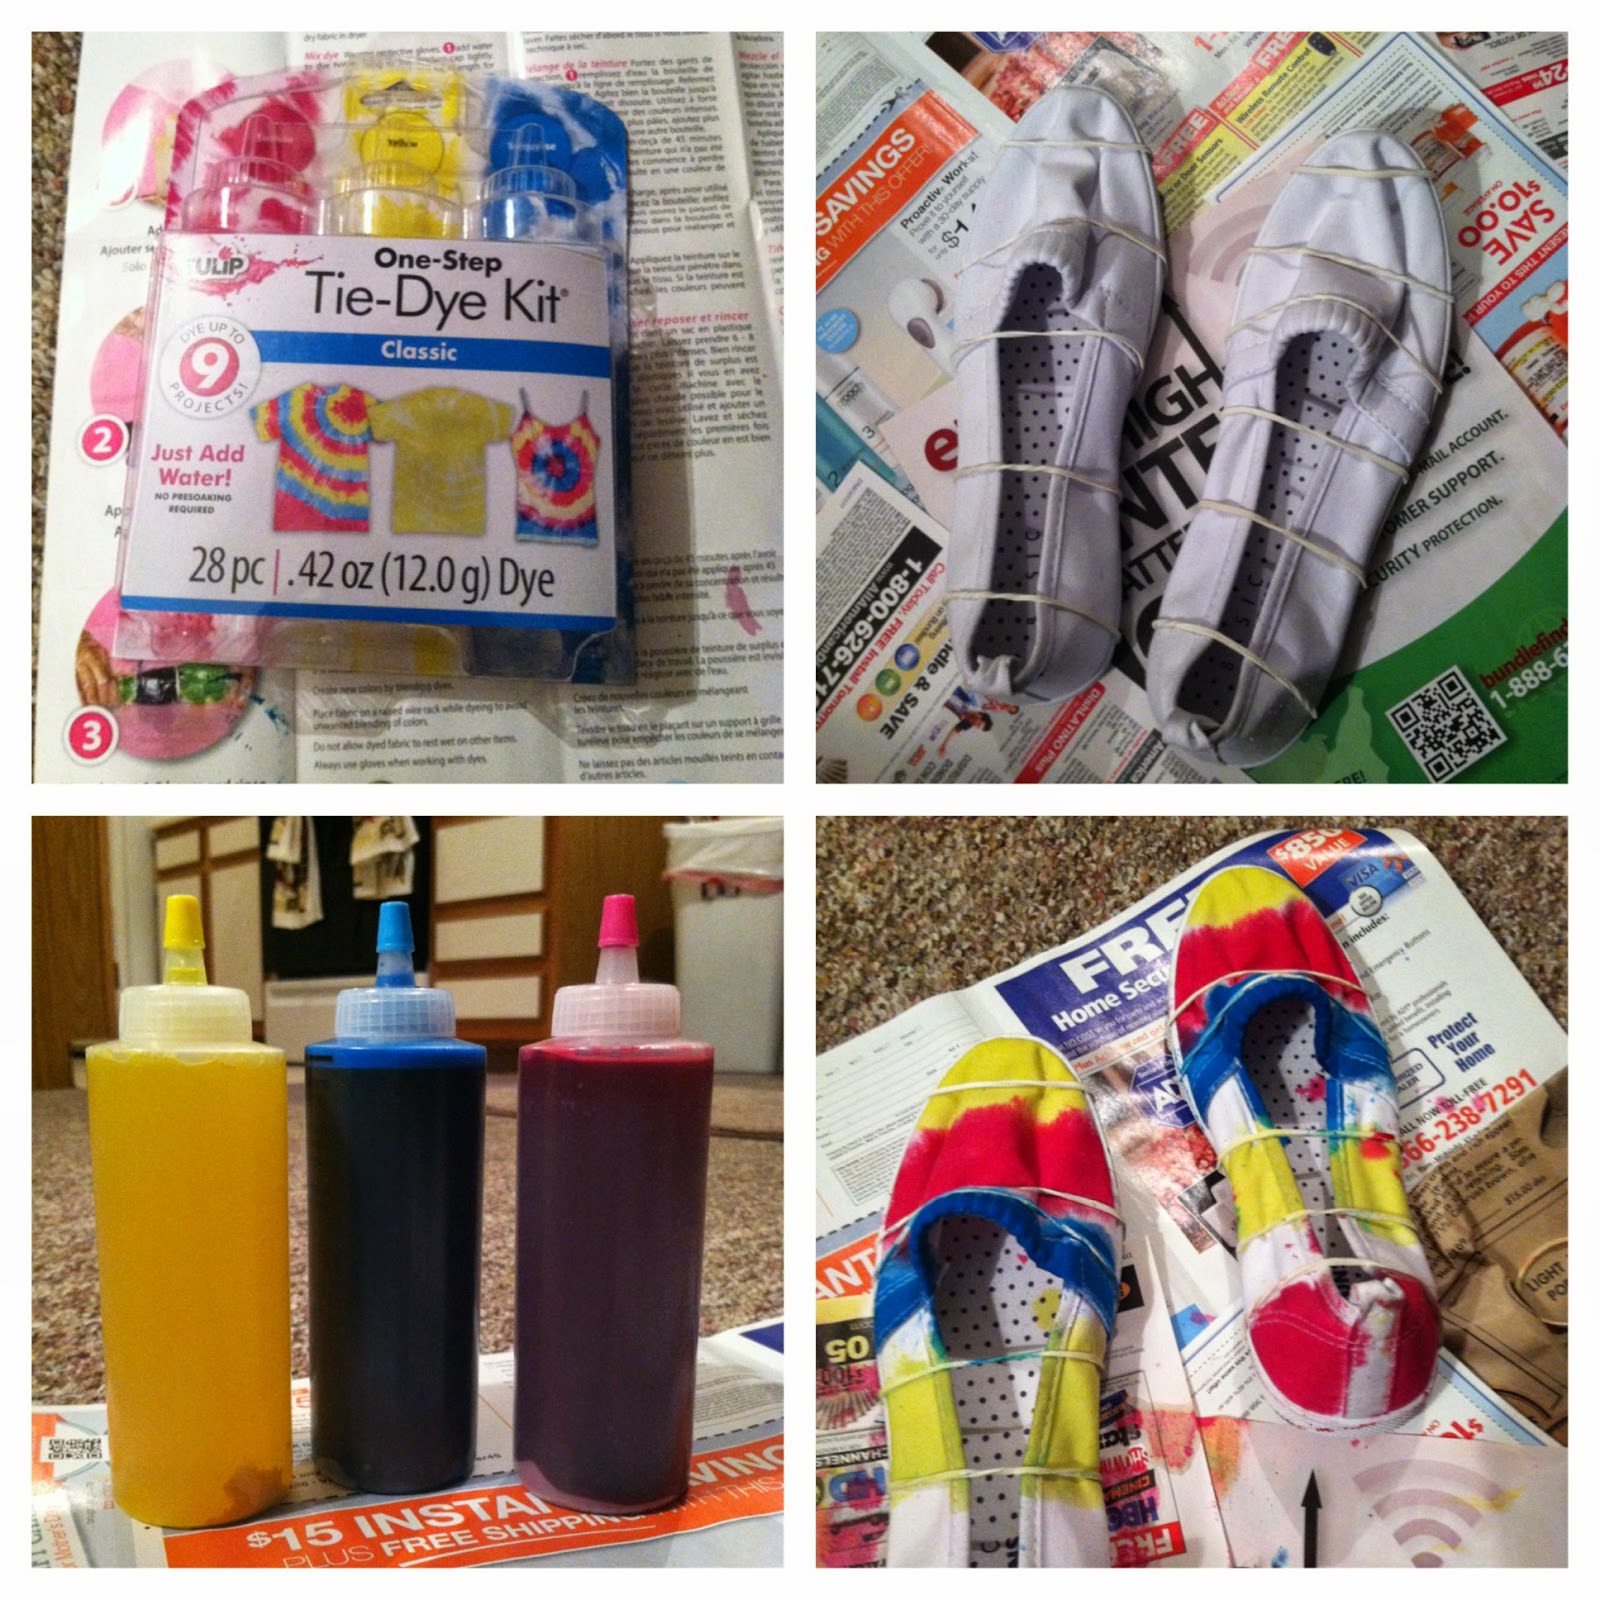
1 Tie-Dye kit, includes:
gloves
rubber bands
3 bottles w/ paint
1 pair of white Basic Edition flats or canvas shoes
1 Newspaper/Magazine
I bought these Basic Edition flats from K-mart for only $8. They are super comfortable and are 100% cotton. If you don't wear flats you can also use a pair of white Vans or any light colored canvas shoes, preferably made from cotton.
*Prior to starting your project, it is recommended that you wash your item with warm water. This will remove any oils or sizing that may interfere with the dye.
The first thing I did to prepare was place unused newspaper/magazine on the area that I was going to be working at. Try to avoid places that have dust or dirt. Once that was set, I placed 5 rubber bands on my shoe. These will be the areas where I wanted the paint and the design to show. The rubber bands help to divide the colors and form the tie dye effect.
Since there were some creases on the shoes I had to lift them to position the rubber band in place. Depending on the shoe, place a tight rubber band for more sustainability.

The colors that I decided to use, which were included in the kit were yellow, blue, and pink (which also looks like red lol). You can buy a one-step kit at Walmart for $10. If you've never seen tie dye paint, it usually comes in a powdery like form. All you have to do is add cold water, pour it in the bottle until it reaches the rim or the designated line, and shake until the powder dissolves. I would suggest that you have your shoes and plastic gloves ready to paint.


When I began painting or dying, I started off with yellow and then continued to add in the other colors. It was a bit difficult to add the paint since it kept slipping, so I just tilted the shoe(s) and with my gloves carefully spread the paint so that it could fill in the white areas. This is how it looks! There maybe be some dripping so be prepared.

Once that was done, I took off my gloves and carefully saran wrapped each shoe and placed them on top of a paper bag or solid surface to dry. The drying process takes about 6-8 hours, you can leave them longer for a more vivid color.
Since I started this project at night, I had to wait until the next morning to see how they turned out.
The next day...
I could see that the color had already dried, so I unwrapped the shoes and carefully took off the rubber bands. My next and final step was to wash and dry my shoes. I added a little bit of soap to the washer and set it to hot. When you are washing your newly tie-dyed items, don't mixed it with other clothes, since the color is still fresh and it might stain.
Once that was done, I put them in the dryer....they are almost ready!!
and
TAADAAAH! My shoes are ready to go!

There are a lot of things to consider when you are tie-dying, like how much color you might want or when colors mix how is it going to look...etc. But it's cool to see the process and what your end product will look.
Continue to wash your shoes or tie-dyed projects (t-shirts, bags, etc.) separately.
I hope you all enjoyed this post! If you end up making tie-dye shoes or clothes upload or your photos below!
Happy Blogging!
From LA, With Luv
Fati <3
No comments:
Post a Comment